Hyper-Aligning the Lagom P100 with Ultra-Thin Stainless Steel Shims
The extremely thin and incompressible nature of stainless steel shims allows me to achieve a chirp-to-lock distance under 20 microns on the Lagom P100, indicating near-perfect alignment.
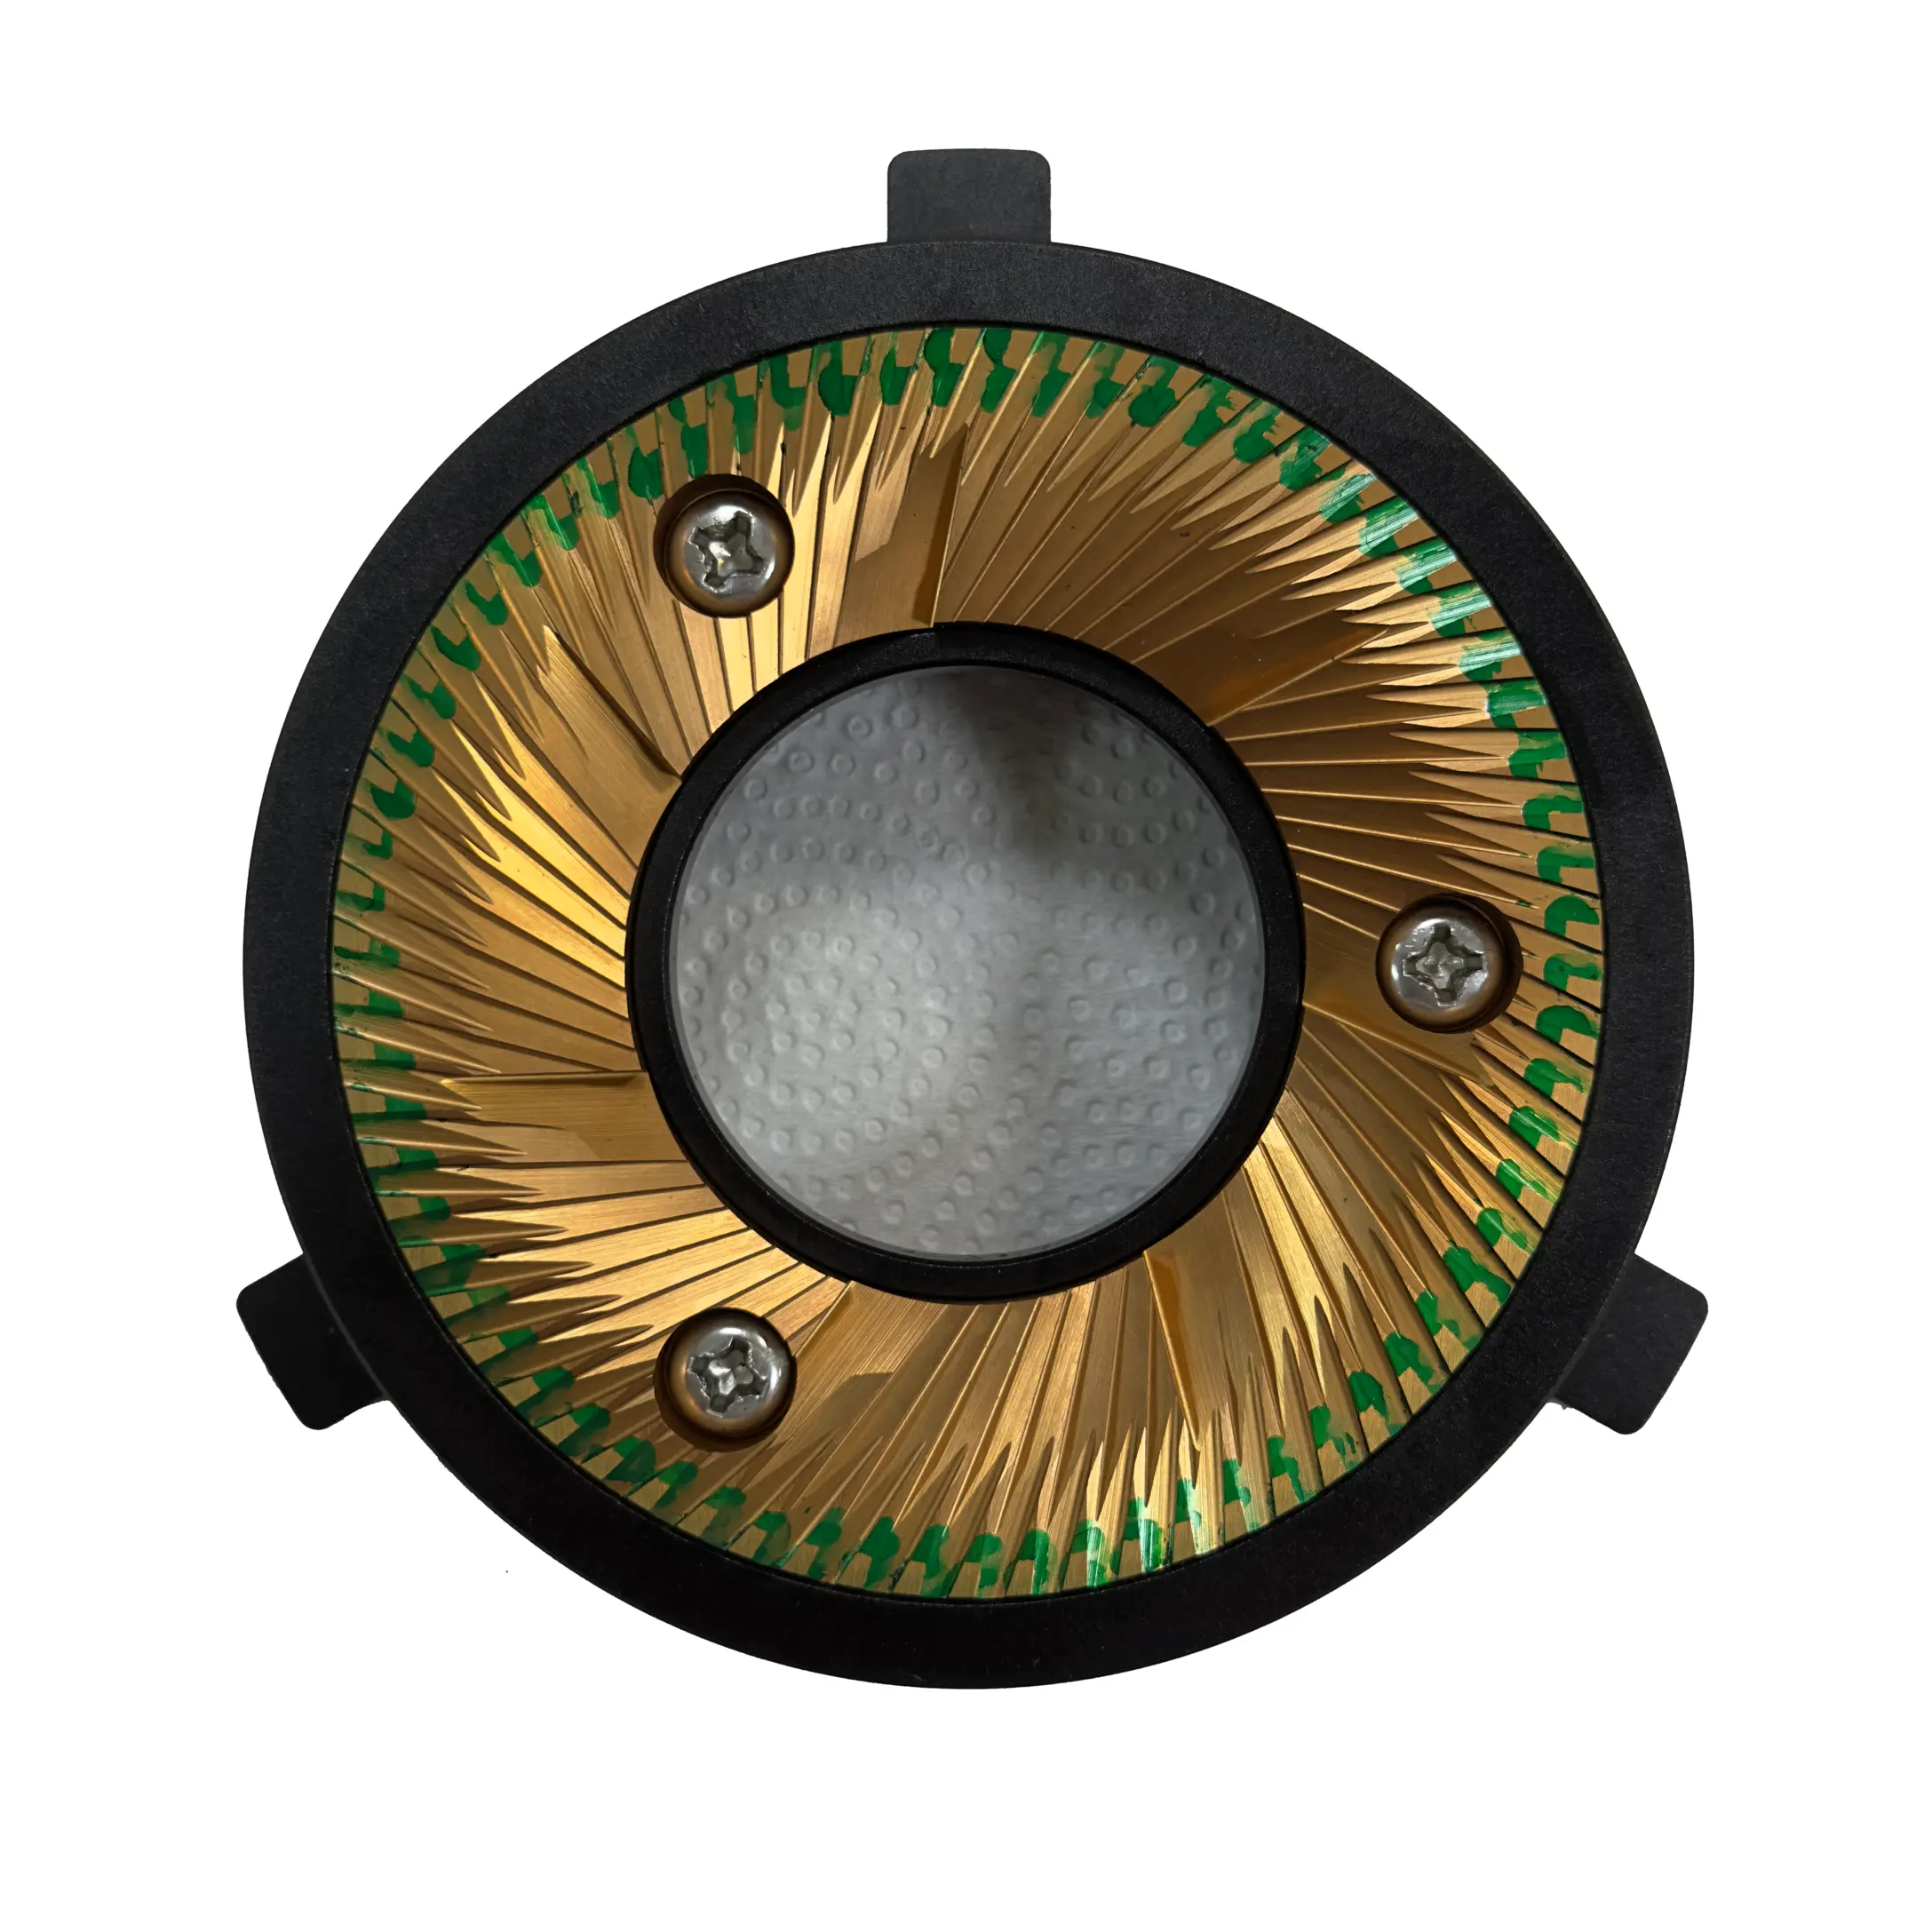 98mm SSP Brew burrs showing full wipe after alignment
This blog’s instagram account is live! Going forward, shorter reviews and thoughts will be posted on IG. Please follow!
Disclaimer: All English content in this blog is AI-translated. Apologies for any quirks–blame the bots!
In this article, I’ll guide you through the process of using the marker test and stainless steel shims to align flat burr grinders. I’ve meticulously documented my alignment of the 98mm SSP Brew burrs in the NTU Coffee Club’s Lagom P100. If you own this grinder, you’ll find the alignment process incredibly useful. However, even if you have a different grinder, this article should still serve as an excellent reference.
The Importance of Alignment
With flat burrs, coffee beans fall through the center hole, are propelled outward by inertia while being ground, and exit as grounds once their size is smaller than the gap between the burrs.
Thus, the parallelism between the burrs is critical. Misaligned burrs result in inconsistent gaps, leading to uneven particle sizes and reduced grind uniformity, as illustrated below.
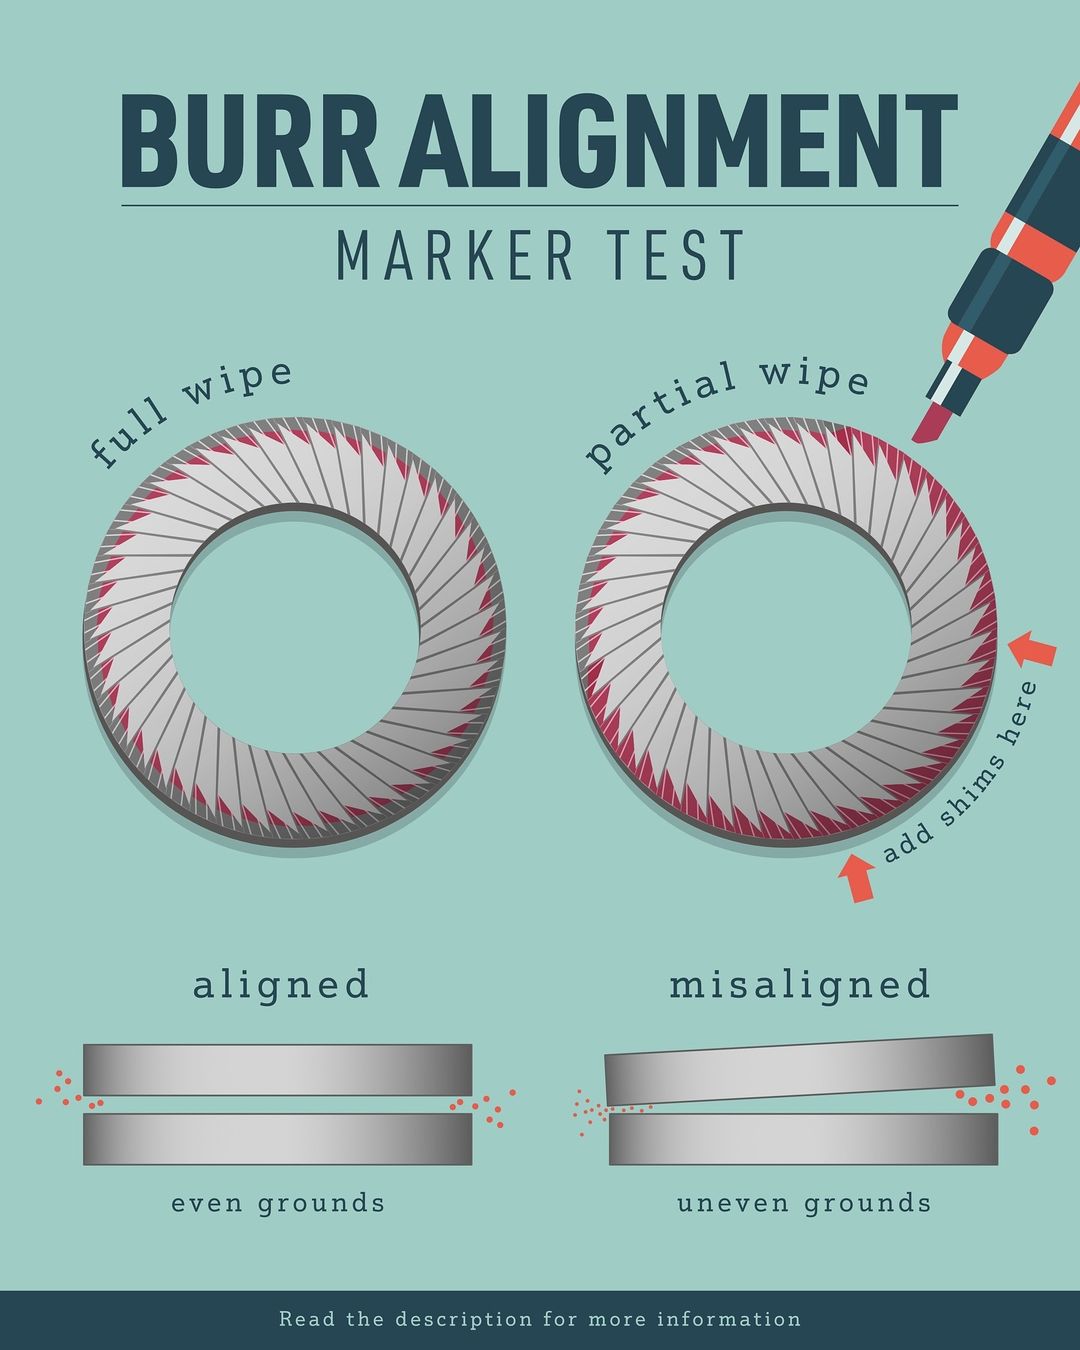 The importance of burr alignment and how to check alignment with the marker test
(source: IG, aramsecoffee)
In the bottom right image, the burrs are not parallel: the gap on the right is larger, resulting in larger coffee particles on that side. This leads to non-uniform grinding.
Chirp-to-Lock Distance
A common indicator of burr alignment is the chirp-to-lock distance, which is the distance between the chirp point and the lock point of the burrs.
Chirp Point
The chirp point is usually where the zero point is set on most grinders. With the grinder running, slowly adjust finer until the burrs touch and make a sharp sound (chirping). The setting at this point is the chirp point.
The burrs are very hard, so this process won’t damage them, but be careful not to adjust any finer to avoid damaging the motor.
Lock Point
After finding the chirp point, turn off the grinder (be sure to turn it off!). You can still adjust finer, and the distance you can adjust until it completely locks up is the chirp-to-lock distance. The setting where it completely locks up is the lock point.
For example, before alignment, the setting on my P100 was -0.8 when the adjustment dial could no longer be turned finer, meaning the lock point was -0.8. The chirp point was 0, so the chirp-to-lock distance was 0.8. On the P100, 1 mark represents a burr gap of 75 µm, so the chirp-to-lock distance was about 60 µm.
Essentially, when the burr size and geometry are the same (e.g., both are 98mm SSP Brew burrs), a smaller chirp-to-lock distance indicates better burr alignment, as it means the burrs don’t touch even when very close together, indicating better parallelism.
How to Perform the Marker Test and Use Shims for Alignment
A common method for checking burr alignment is the marker test, which, as the name suggests, uses a marker to check alignment.
First, let’s clarify one thing. Although we keep mentioning the concept of parallelism, the two burrs need to be not only parallel to each other but also perpendicular to the rotation axis. This is because only one of the two burrs is fixed in position, while the other rotates. So if the burrs are not perpendicular to the rotation axis, even if they are parallel at a certain relative angle, they will still be non-parallel once the burrs start rotating.
Therefore, the marker test is not just about checking if the burrs are parallel but also about checking if the burrs are perpendicular to the rotation axis. The method is simple: apply marker ink to the flat edge of one burr, reinstall it, and locate the chirp point. After finding the chirp point and allowing the burrs to rub slightly, remove the burr. If the marker is wiped off all around the circumference, which we call a “full wipe”, it indicates the burr is perpendicular to the rotation axis. Conversely, if the marker is only wiped off in one spot, that spot is the first point of contact when adjusting finer, indicating the highest point of the burr.
To shim the lower side of the burr, place shims under the screw opposite the high point. Repeat this process until a full wipe is achieved, then align the other burr using the same method to ensure parallelism.
For example:
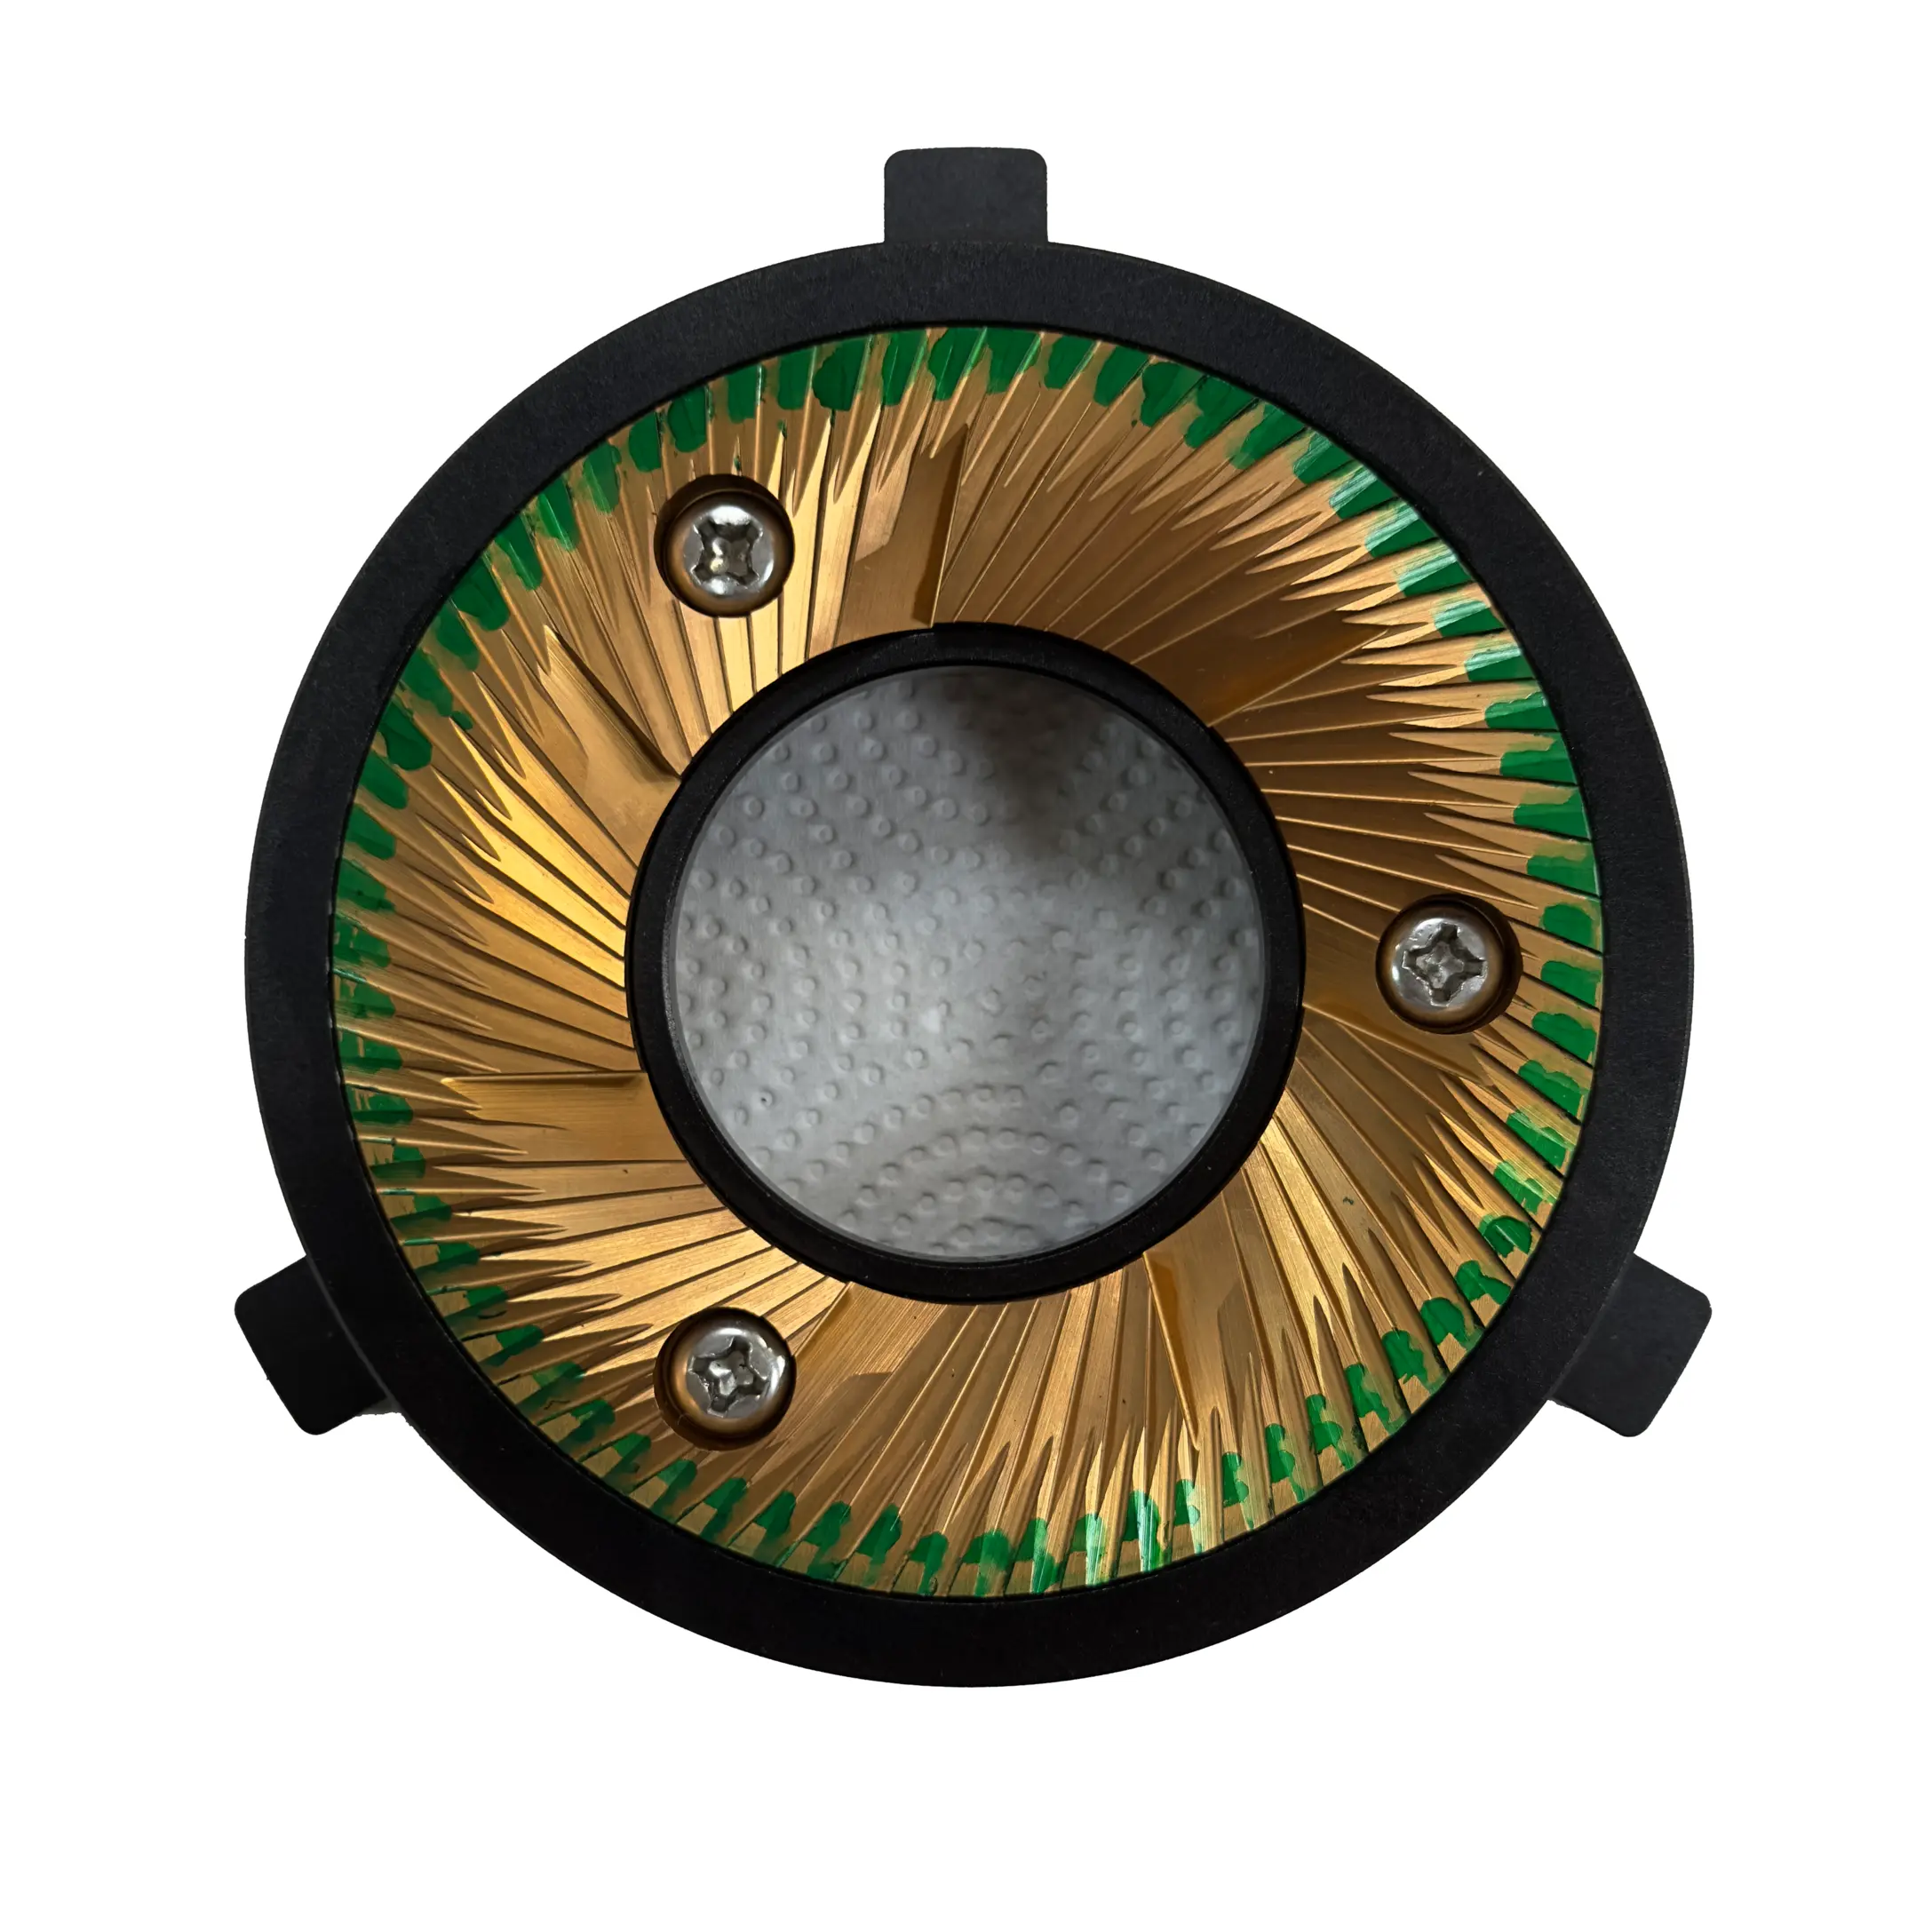 Burr right after the marker test
Upon closer inspection, the marker has been wiped off from about 3 o’clock to 9 o’clock, so the high point is at 6 o’clock. This means we need to add shims at the 12 o’clock position. Since there is no screw exactly at 12 o’clock, we usually start with the screw closest to 12 o’clock (i.e., the top left screw).
It’s important to note that shims can only be placed under the screws (usually one shim of equal thickness on each side of the screw), because placing shims between screws may cause the burr to bend as the screws on both sides will apply downward force on the burr, and the shims in the middle will form a fulcrum.
The logic behind this method is quite simple: keep adding shims to the lower areas until the burr is aligned. However, if you think about it carefully, you’ll realize that this is a very time-consuming and laborious task, as it requires countless disassemblies and reassemblies of the grinder.
For a clearer explanation, I highly recommend watching this classic tutorial video.
Why Use Stainless Steel Shims?
Shims are usually 0.5 cm * 1 cm and often cut from aluminum foil for its availability and consistent thickness. However, I found that aluminum foil introduces uncertainty in the alignment process. After achieving a full wipe, the alignment doesn’t last. The aluminum foil shims under the lower parts seem to compress over time.
I’m not sure if this is physically reasonable, but many have observed the instability of aluminum foil. The well-known coffee blogger Rohan also recommended using stainless steel shims instead in his article[A]. Additionally, I found that I can get stainless steel shims that are even thinner than aluminum foil, leading me to realign using stainless steel shims, hence this article.
Detailed Alignment Process
The following outlines the process of aligning the 98mm SSP Brew burrs in the Lagom P100, but most steps are applicable to different grinders as well.[B]
I want to emphasize again: the two burrs need to be aligned separately, and the burr with the marker applied is the one being aligned. To achieve better alignment, it’s crucial to align the two burrs separately, ensuring both achieve a full wipe and are perpendicular to the rotation axis.
Required Materials
- Marker
- Torque screwdriver (I used the Wera 7441 torque screwdriver)
- A torque screwdriver ensures consistent torque during disassembly and reassembly, but a regular screwdriver works too.
- I used the 2.5N⋅m torque recommended by OPTION-O for alignment. This torque is suitable for 98mm burrs. For smaller burrs, 2N⋅m is my recommendation.
- Screwdriver bit
- Please choose one that is suitable for your grinder. The P100 and most 98mm grinders use PH3 screws.
- Stainless steel shim
- Thinner shims allow for more precise alignment but increase the time required.
- I used extremely thin 5 µm stainless steel shims, which are more expensive than their 10 µm counterparts.
How to Remove the Upper Burr of the P100 (skip if not using the P100)
Fortunately, my lower burr already showed a full wipe before alignment, so it didn’t need removal. However, I immediately ran into difficulty when trying to remove the upper burr. After unscrewing, the burr was stuck tight.
Customer service explained that coffee fines and oils create a near-vacuum state under the burr, making it difficult to remove due to air pressure. In such cases, tapping the back of the burr with a soft object (I used a screwdriver with a soft-padded handle) can break the vacuum and ease removal.
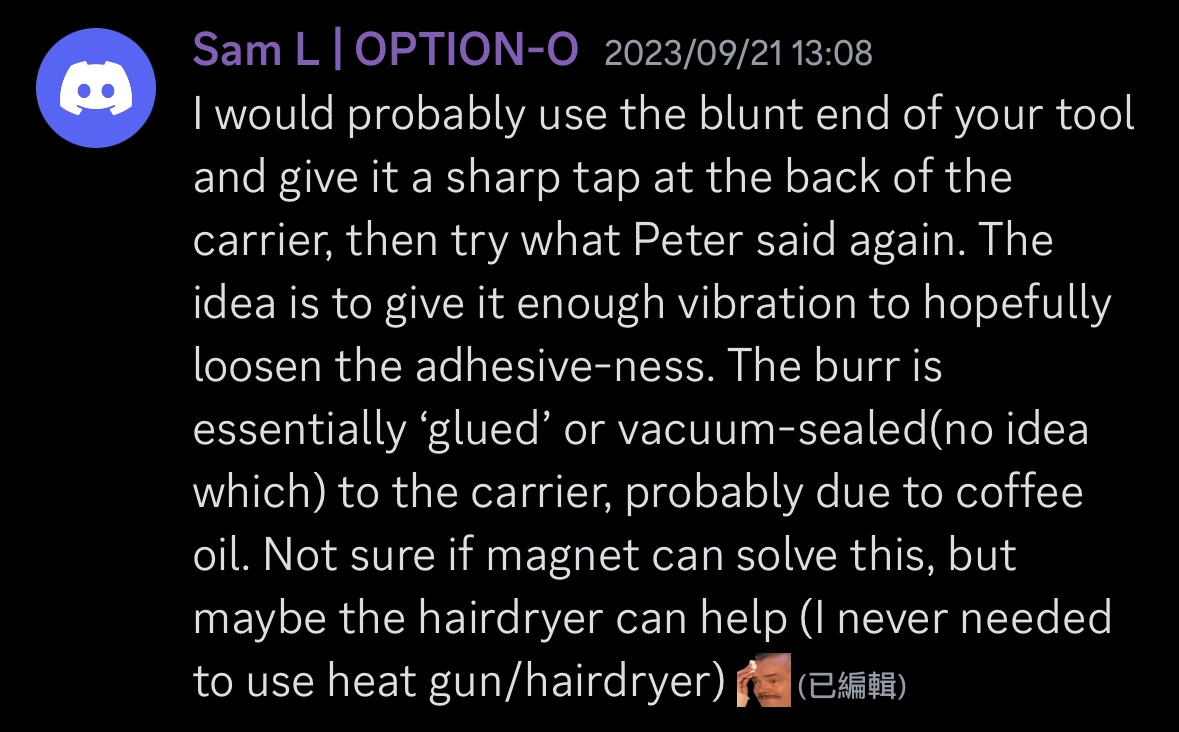 Response from the official technician (Hi Sam!)
This issue took me a while to resolve, so I’m sharing it here for other P100 users who might face the same problem.
Begin the Marker Test and Insert Stainless Steel Shims
Now, we can officially start the marker test. I recorded the results of each test and the screws under which I added shims. These photos have been aligned and edited in Photoshop for easy comparison.
Before beginning alignment, ensure the burr and burr carrier’s relative position remains unchanged, as the burr itself has tolerances. Changing the relative position arbitrarily will affect the alignment.
Here’s the state before alignment, with a chirp-to-lock distance of about 60 µm.
 Fig. 1
(no stainless steel shim inserted yet)
- Area where marker is wiped off: approximately 3 o’clock to 9 o’clock.
- Middle of the high area: 6 o’clock.
The upper half is lower and needs shims added at the 12 o’clock position, but there is no screw there. So, I started by placing stainless steel shims under the screw closest to the low point (the top left screw) and observed the changes in the marker test.
After inserting 7 pieces of stainless steel shim under the top left screw, the marker test shows the following.
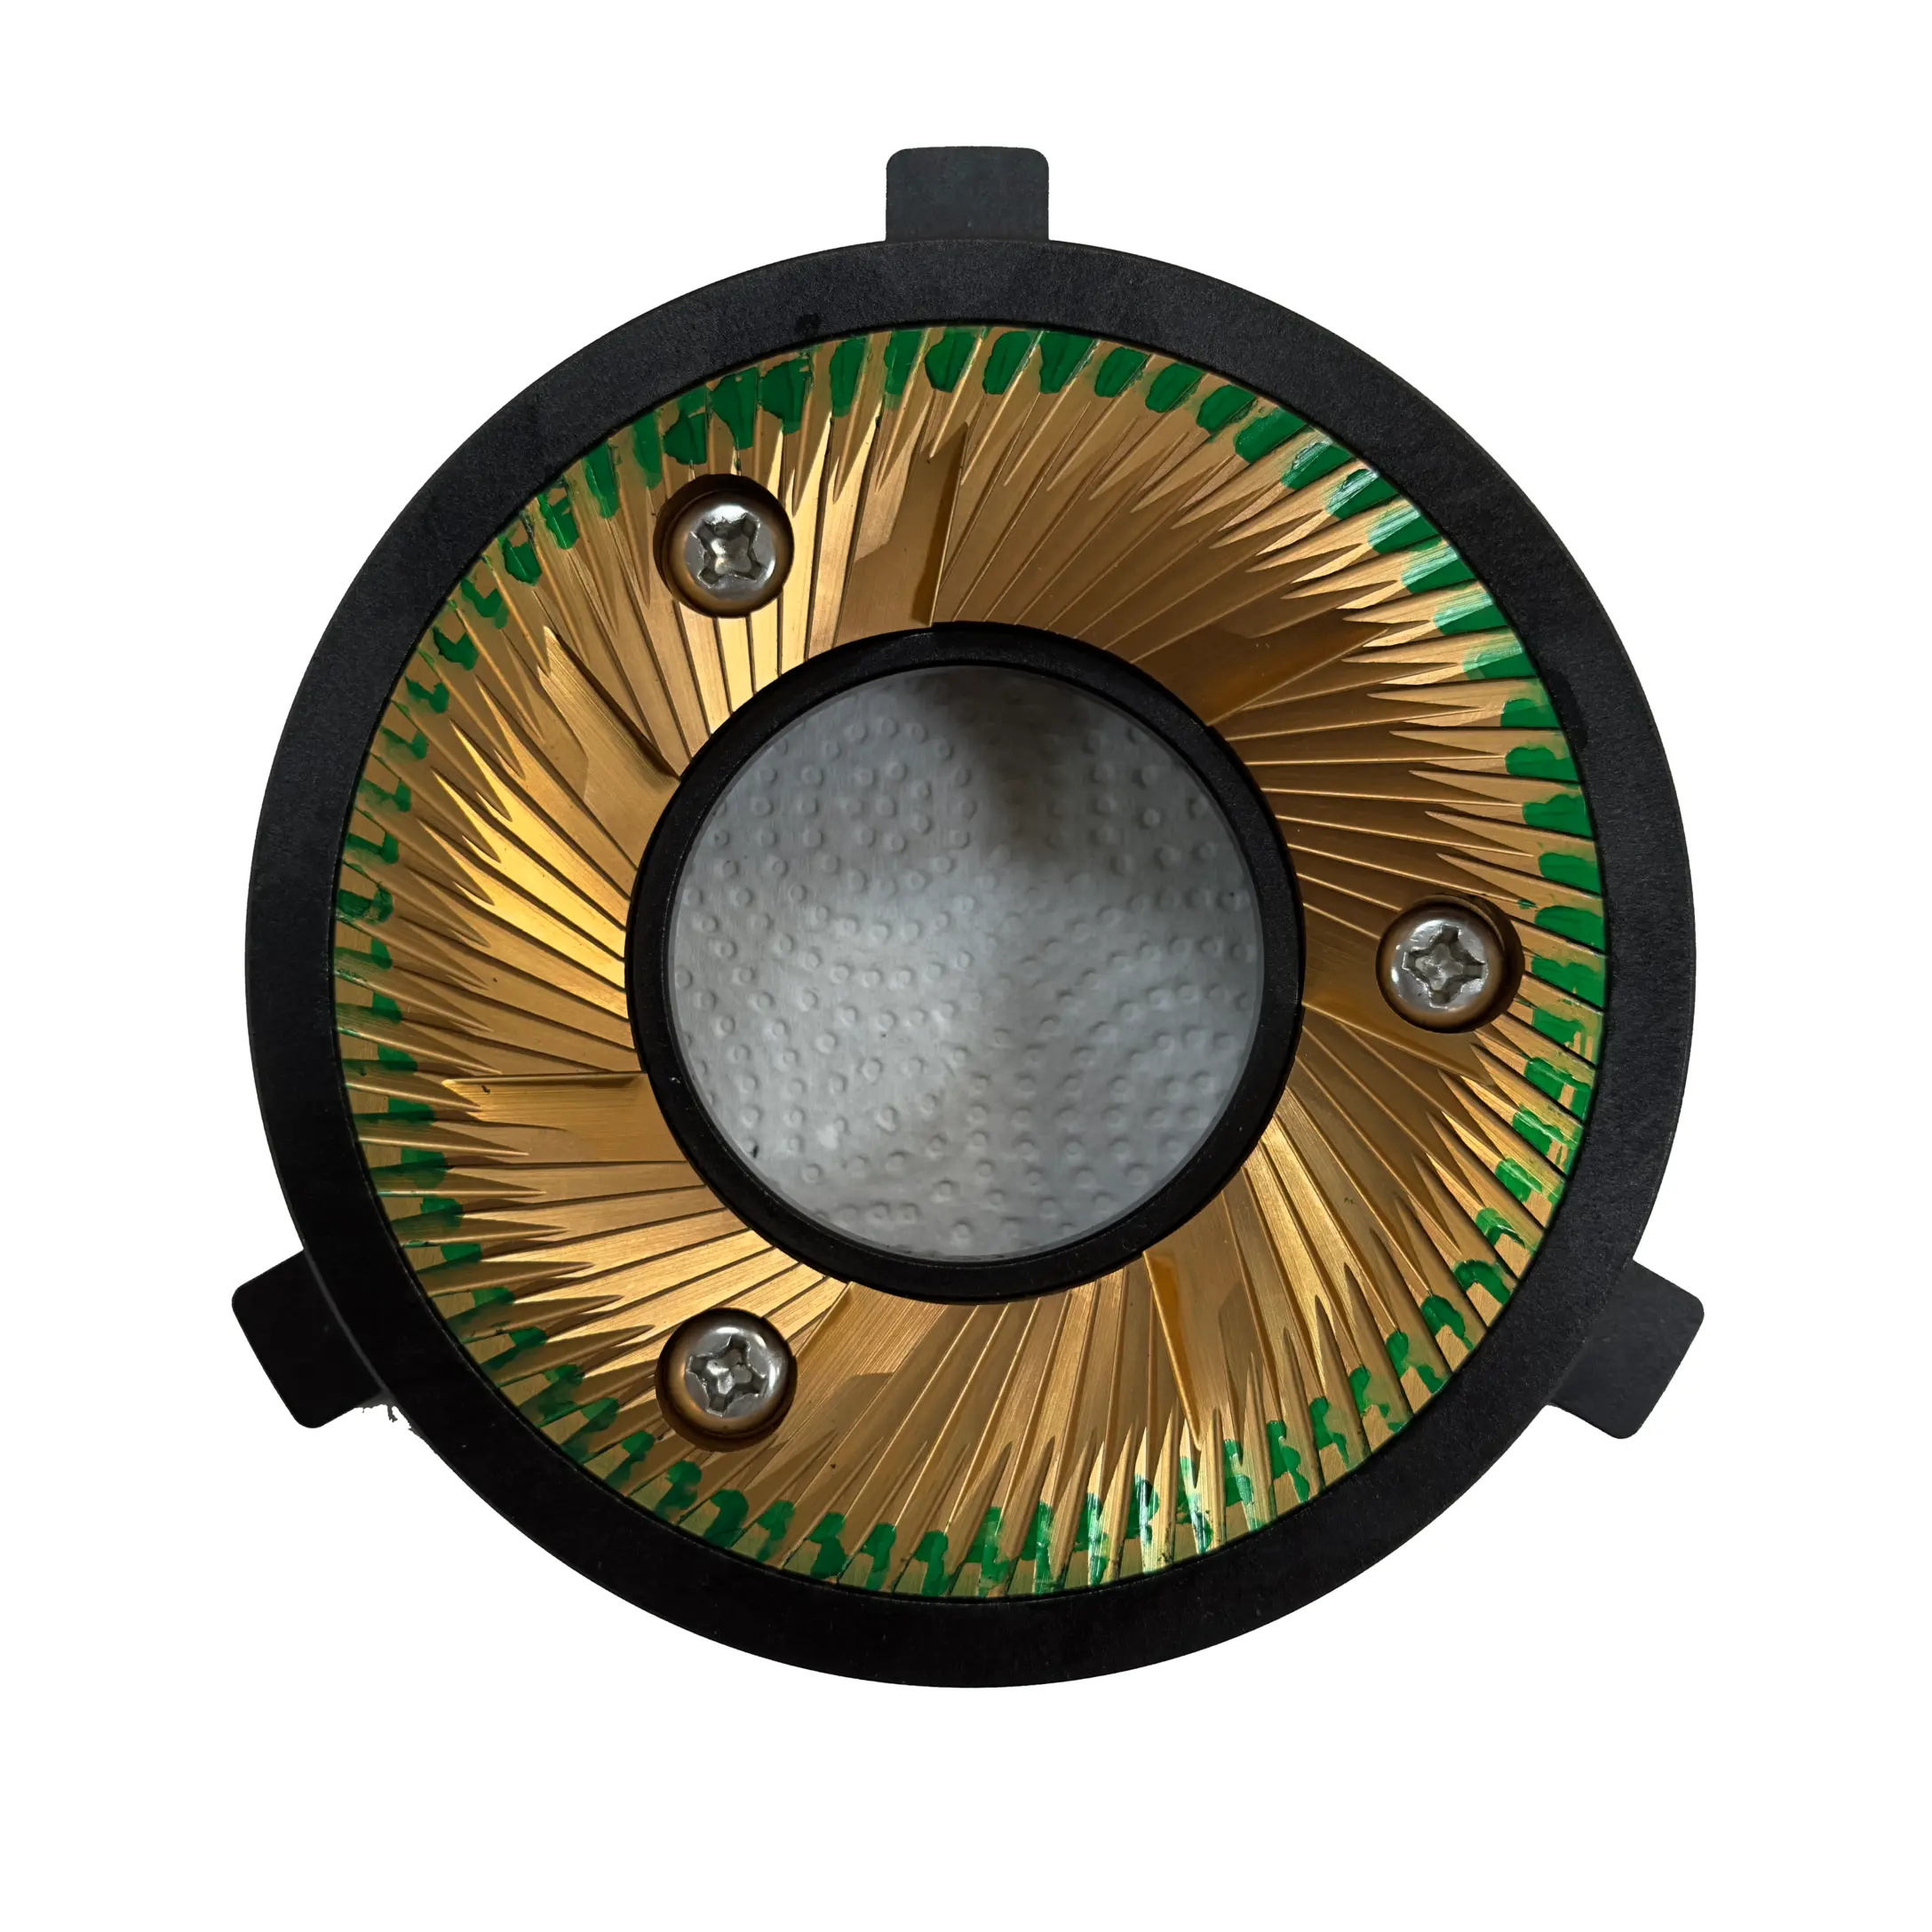 Fig. 2
(7, 0, and 0 pieces of stainless steel shim inserted under the top left, bottom left, and right screws respectively)
- Area where marker is wiped off: approximately 3 o’clock to 11 o’clock.
- Middle of the high area: 7 o’clock (bottom left screw).
The middle of the high area is now at the bottom left screw, indicating we need to insert an equal number of stainless steel shims under the top left and right screws.
After inserting 6 pieces of stainless steel shim under both the top left and right screws, it shows the following.
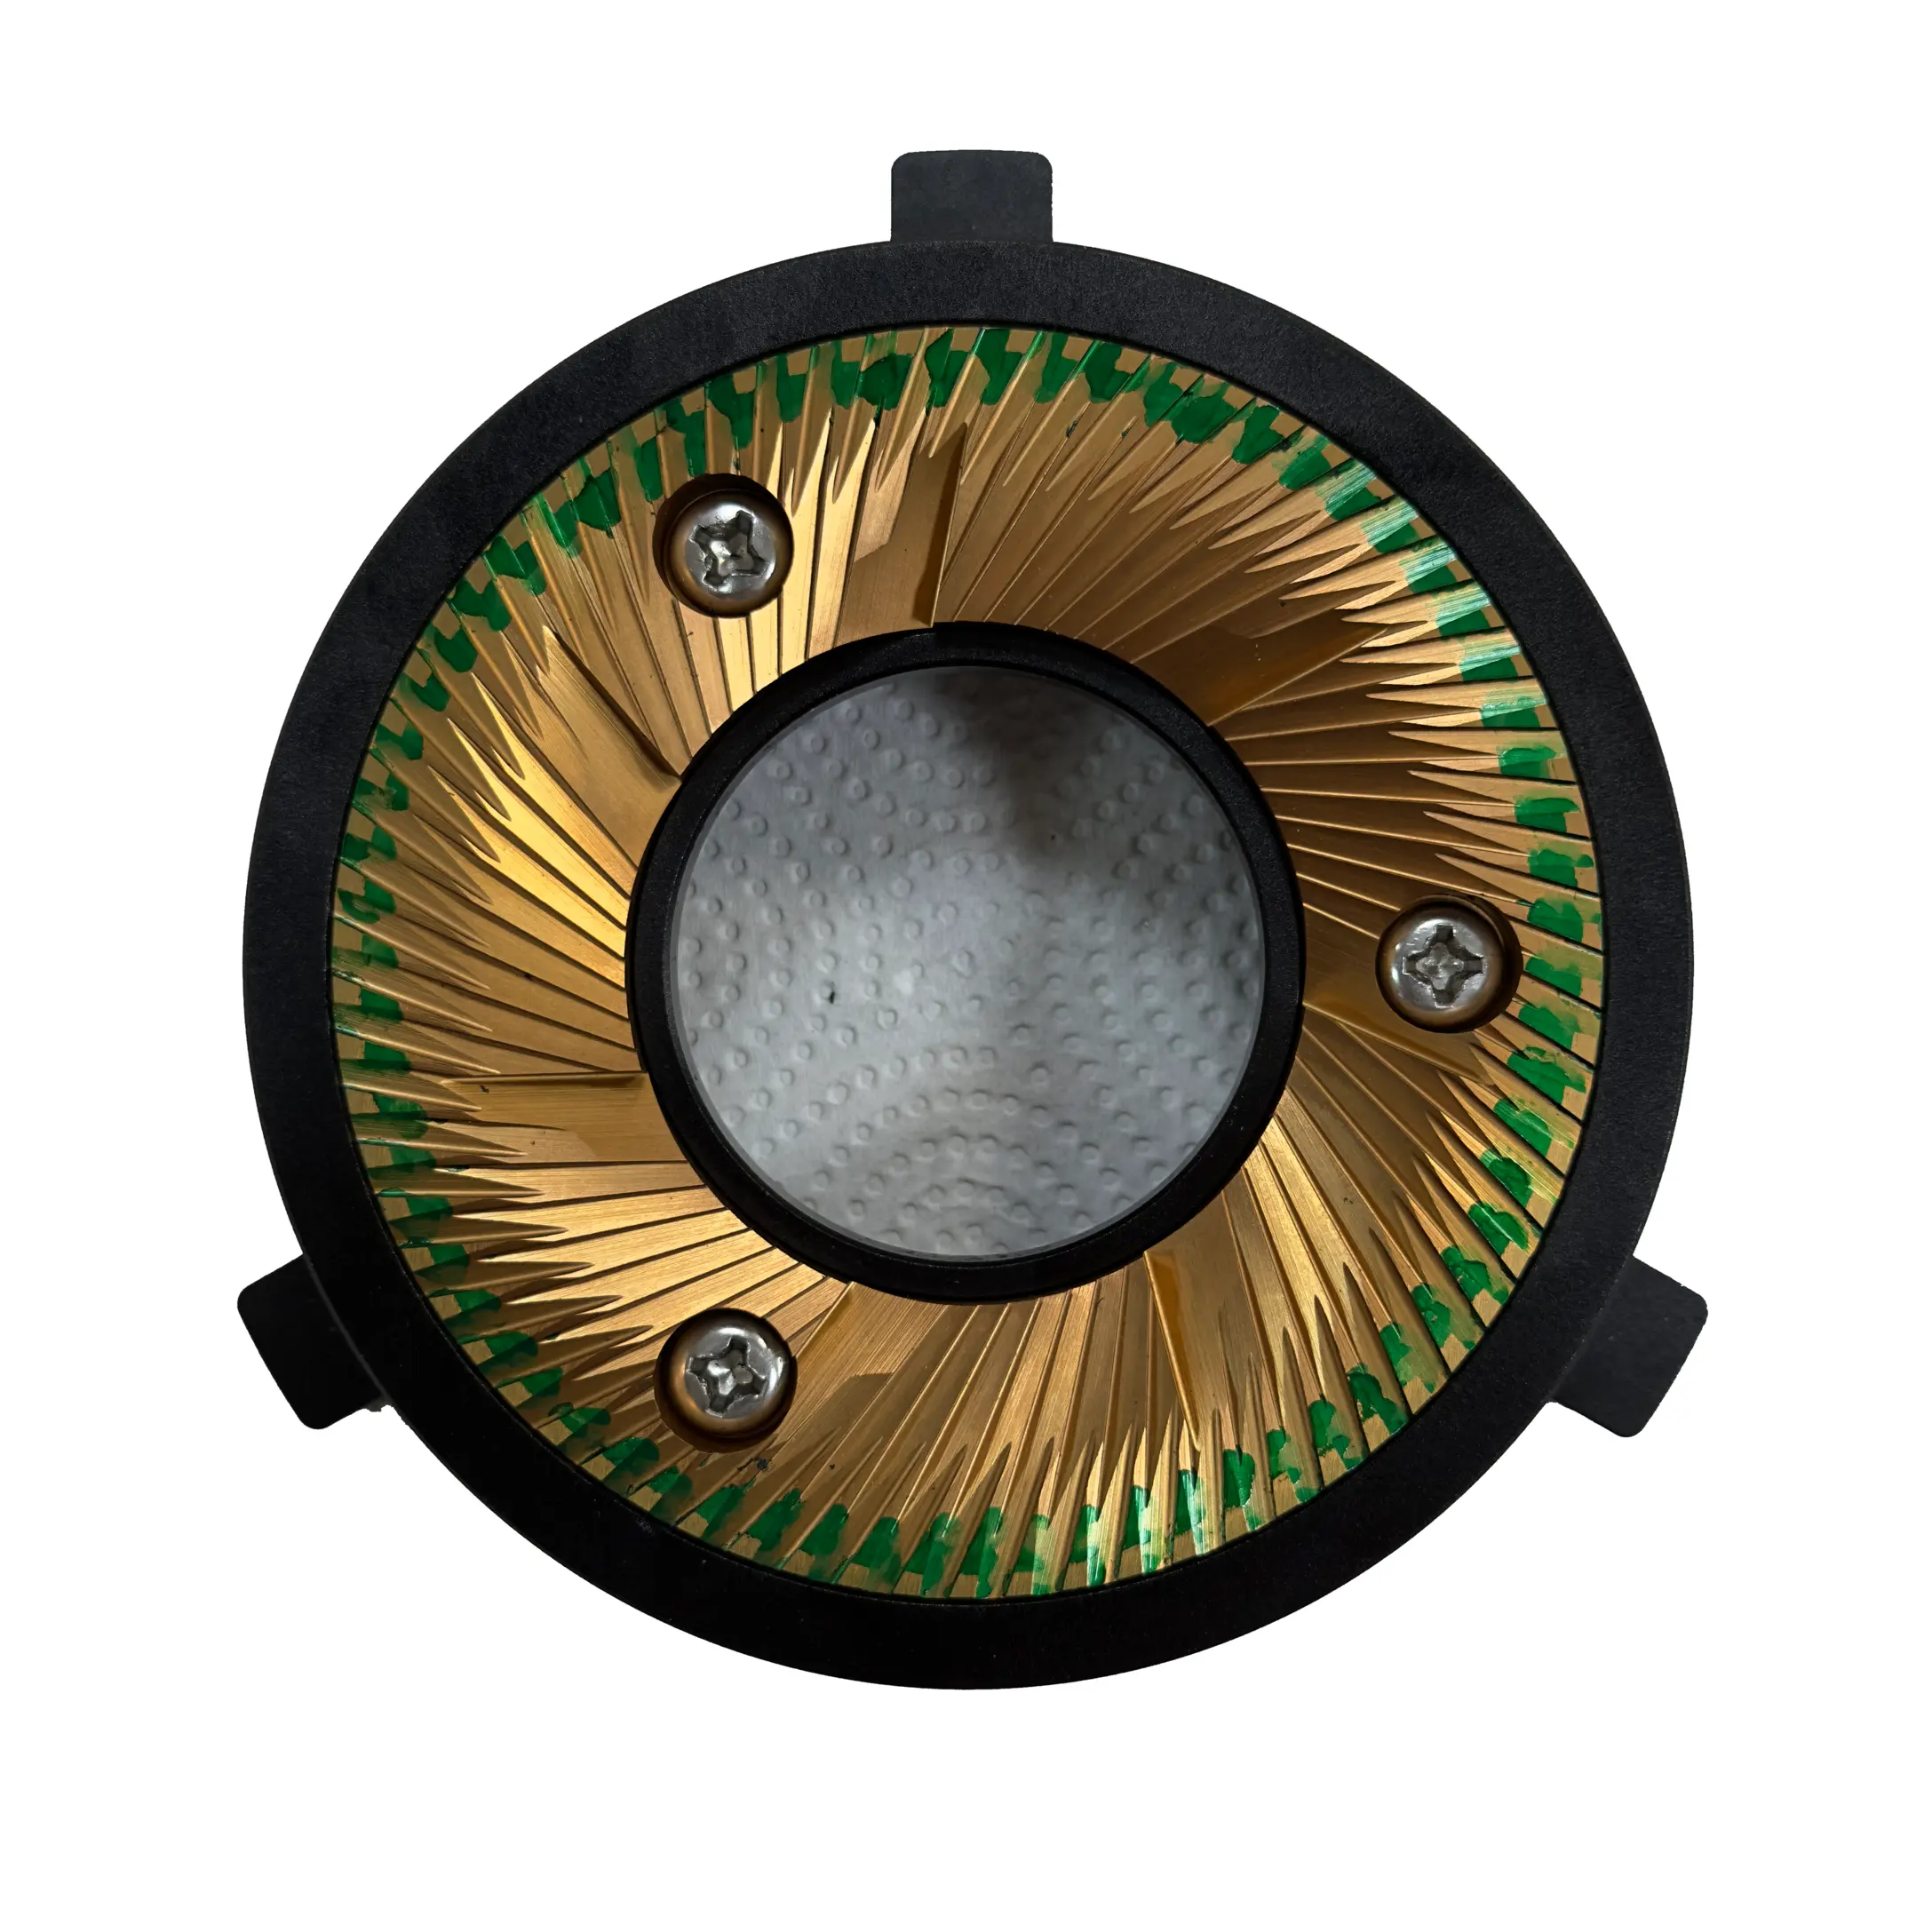 Fig. 3
(13, 0, and 6 pieces of stainless steel shim inserted under the top left, bottom left, and right screws respectively)
- Area where marker is wiped off: full wipe, but the wiped width is obviously larger from 3 o’clock to 11 o’clock.
- Middle of the high area: 7 o’clock (bottom left screw).
The alignment has improved, but the high area remains at the bottom left screw. So, I inserted 3 more pieces of stainless steel shim under both the top left and right screws, after which it shows the following.
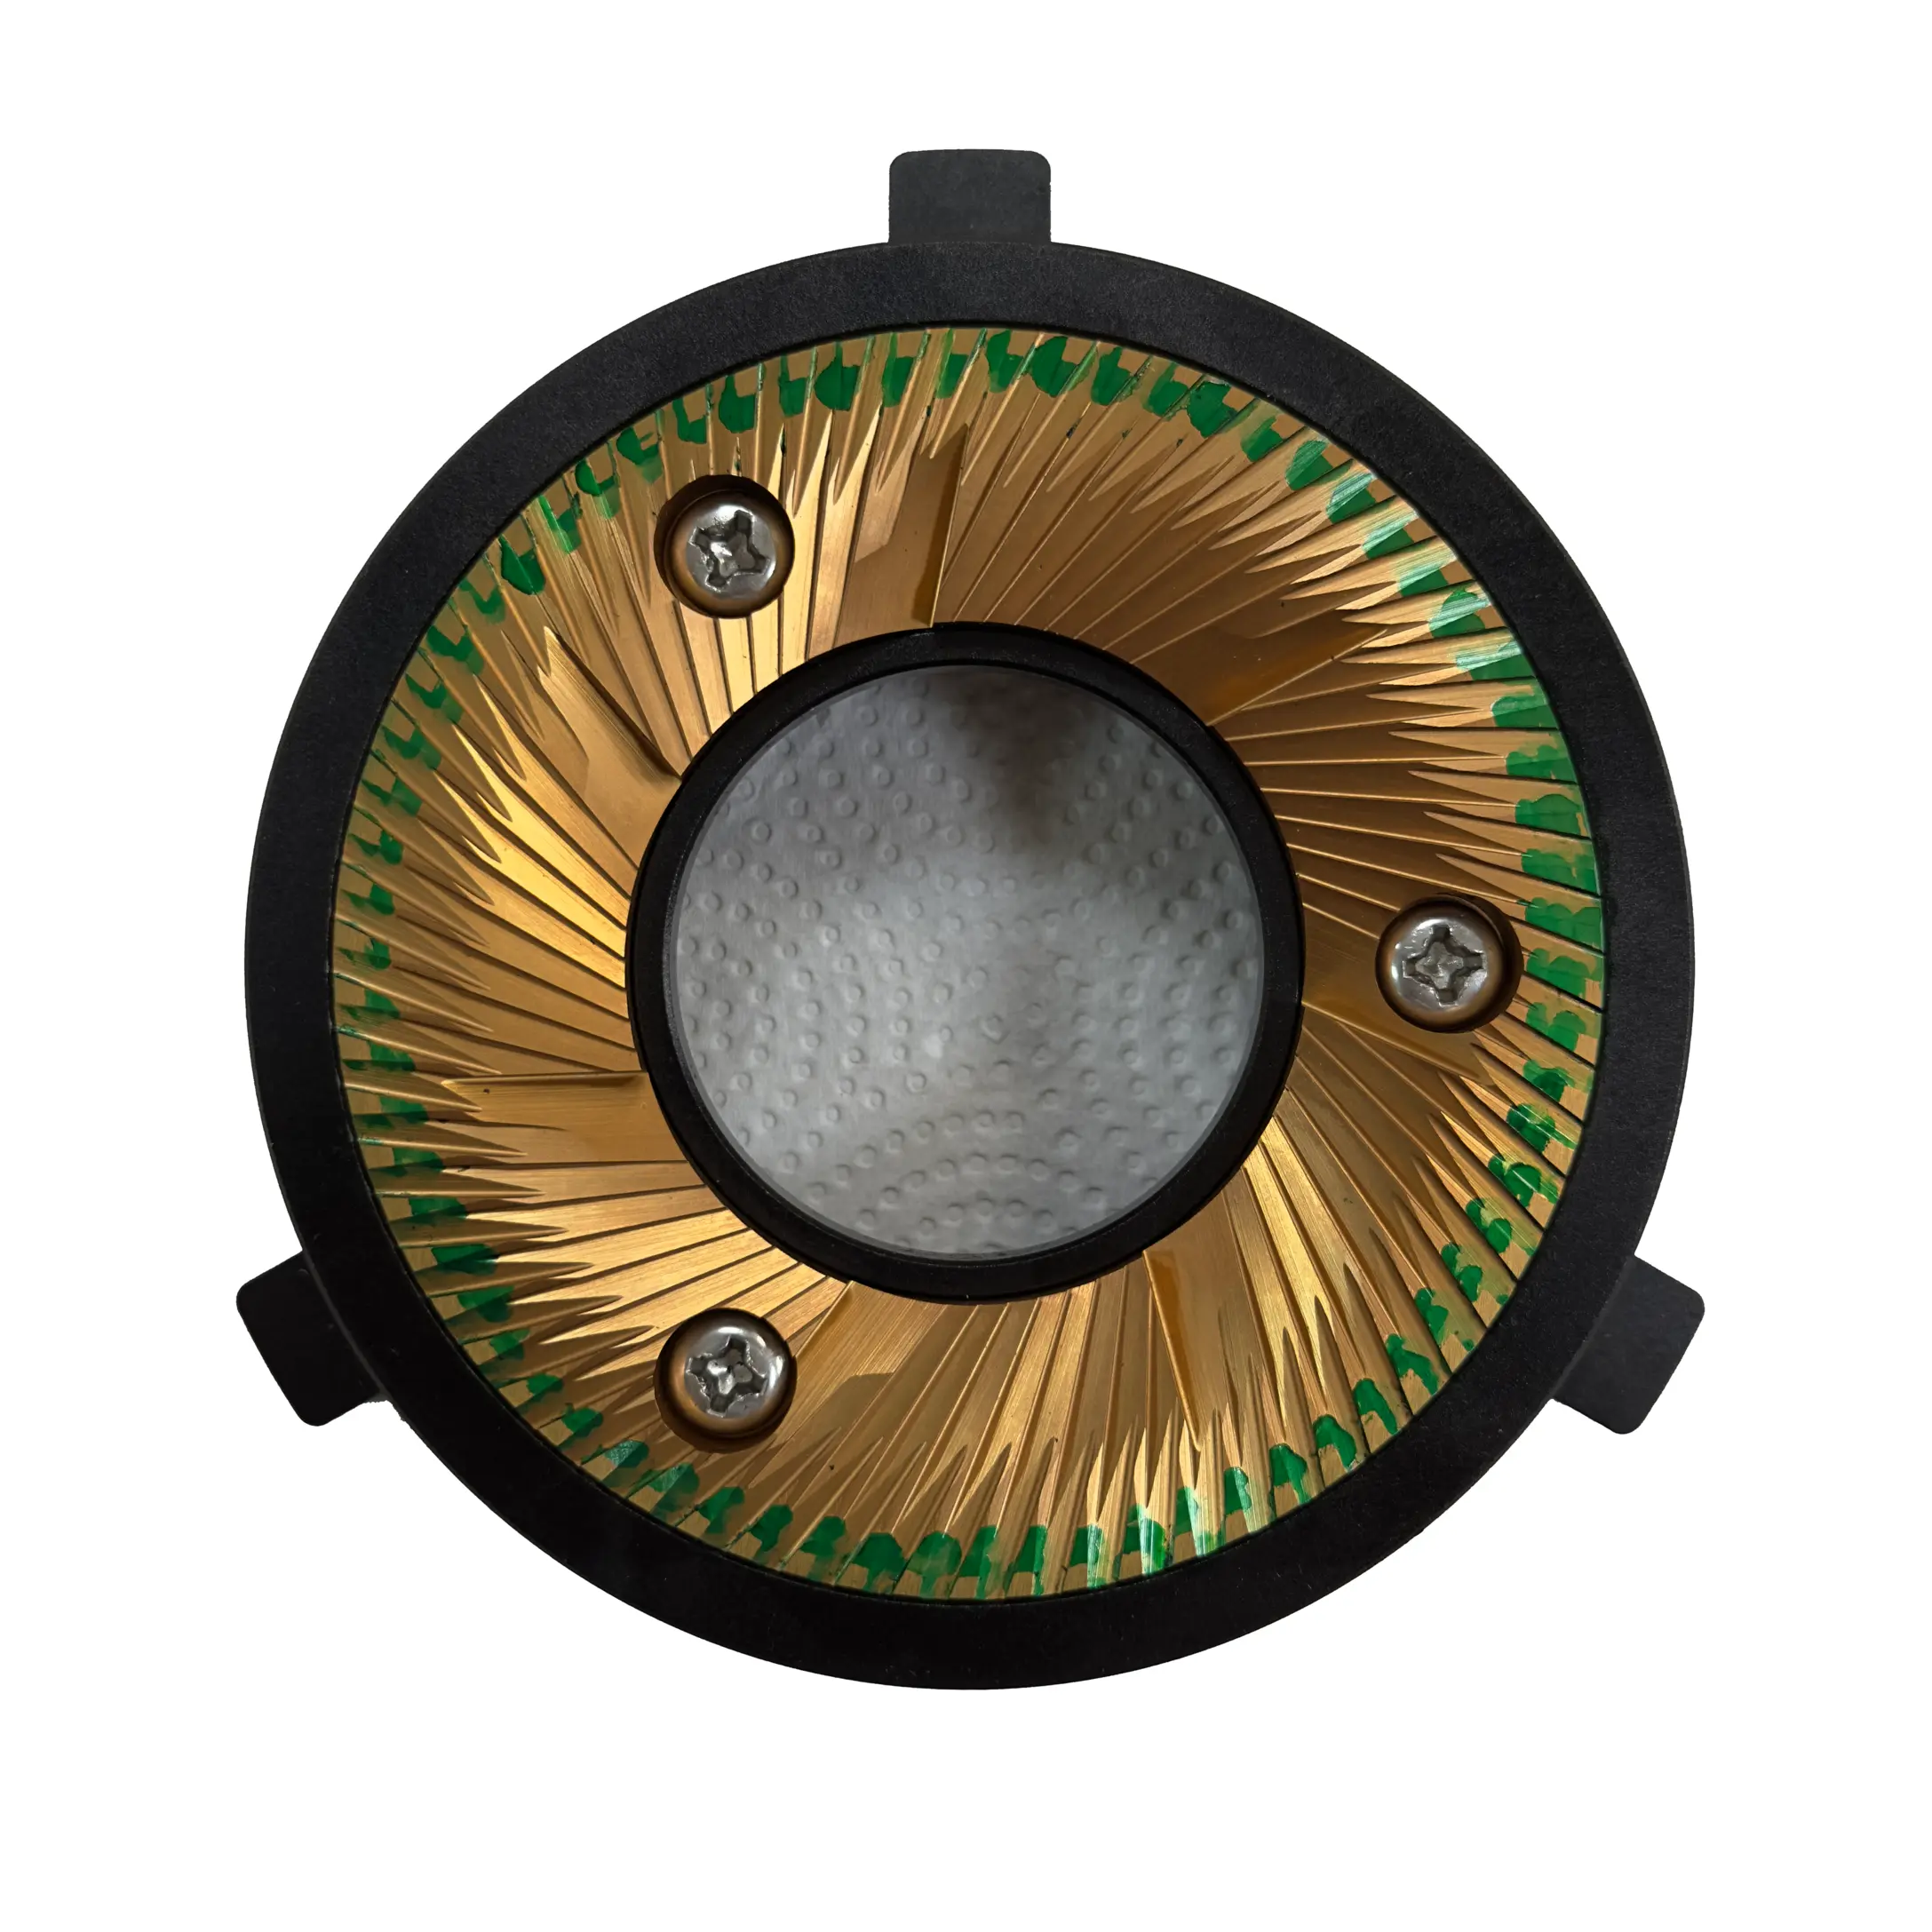 Fig. 4
(16, 0, and 9 pieces of stainless steel shim inserted under the top left, bottom left, and right screws respectively)
- Area where marker is wiped off: all parts except 3 o’clock.
- Middle of the high area: 9 o’clock.
The right screw has become the last low point. I inserted the last piece of stainless steel shim under the right screw and achieved a full wipe as shown below.
 Fig. 5
(16, 0, and 10 pieces of stainless steel shim inserted under the top left, bottom left, and right screws respectively)
- Area where marker is wiped off: full wipe achieved!
At this point, the chirp-to-lock distance has been reduced to about 15 µm, which is considered almost perfect alignment (usually below 30 µm is considered perfect). In the end, 16, 0, and 10 pieces of 5 µm stainless steel shim were inserted under the top left, bottom left, and right screws respectively.
I compiled the entire alignment process into a gif, as shown below:
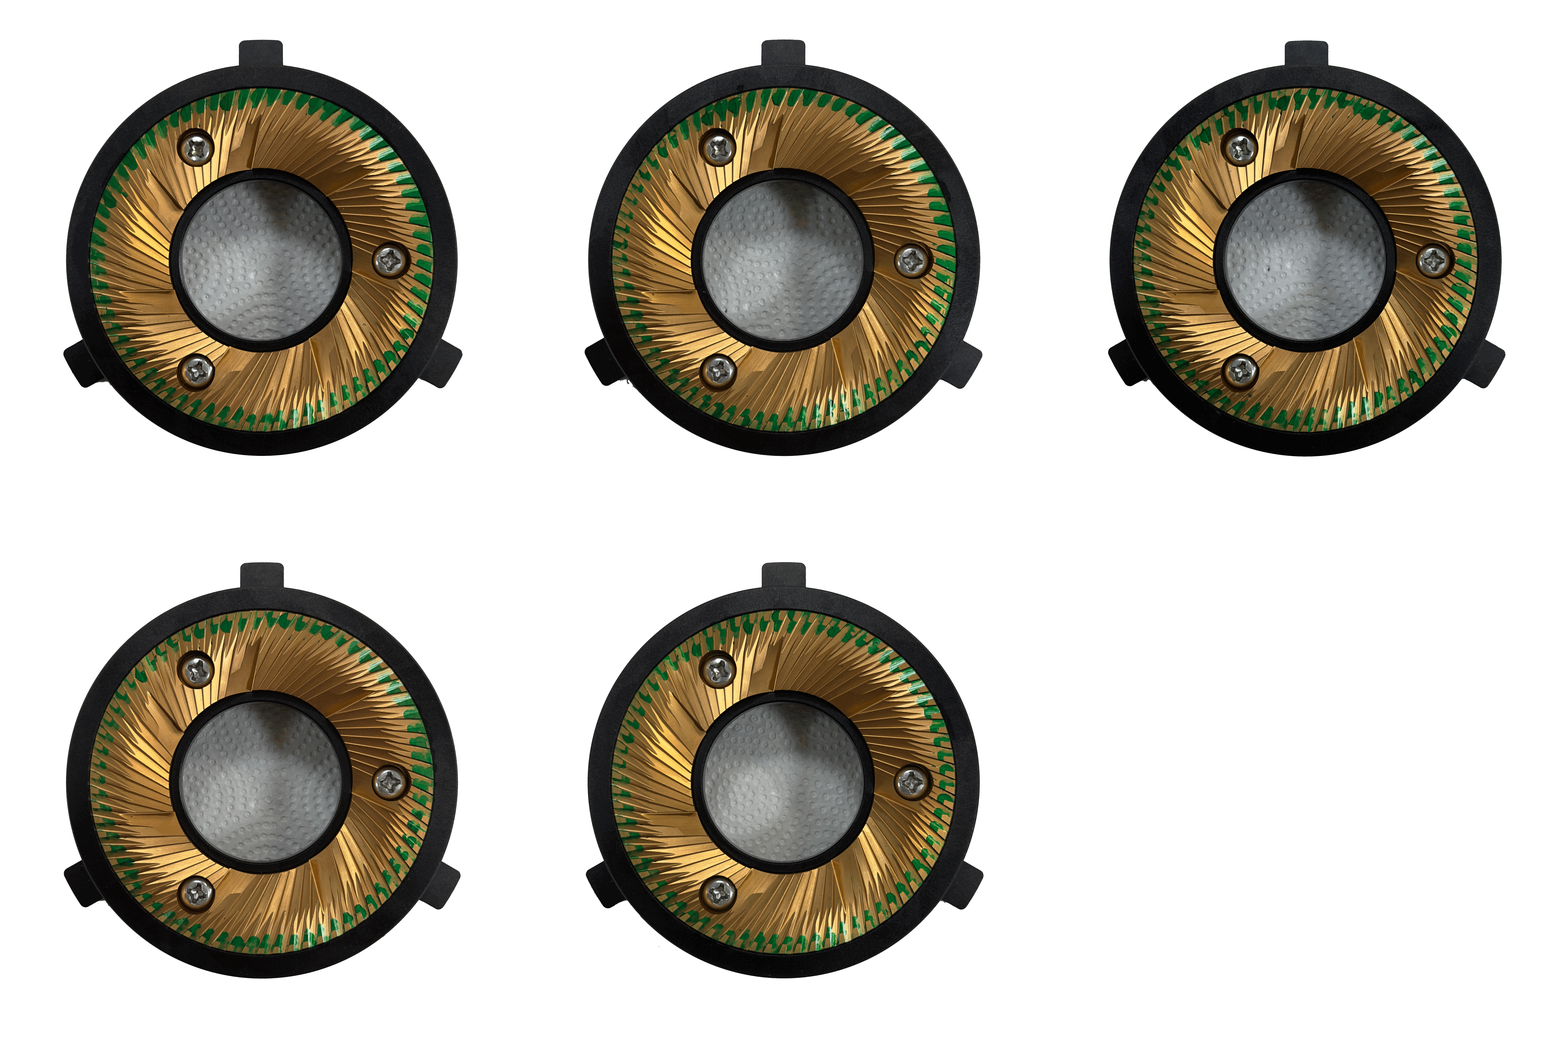 Animation of the entire alignment process
The area where the marker is wiped off expands as more stainless steel shims are inserted, indicating gradual improvement in the alignment of the burrs.
Conclusion and Discussion
The Precision of the Lagom P100
When perfect alignment was achieved, 16 pieces of stainless steel shim had been inserted under the top left screw of the burr, totaling 80 µm in thickness. This seems at odds with OPTION-O’s precision guarantee. Their website states:
Every critical part of the grinder is CNC-machined to a tolerance of <10 microns, with a flatness tolerance of < 5 microns. Each piece of CNC-machined parts is confirmed using industrial CMM (coordinate measuring machine) post-machining, or else they will be rejected. So we are confident the parts will be perfect. No user alignment is required.
However, I don’t fault them. Everything has tolerances, including the burrs made by SSP. Achieving near-perfect alignment on every machine like Titus or zerno is extremely challenging.
In essence, don’t take the manufacturers’ word for it… Performing your own alignment is not only reassuring but also an enlightening experience!
The Difference Caused by Alignment and Its Necessity
Has the particle size distribution become more uniform after alignment? Does the coffee taste better? I believe so, but to be honest, I’m not entirely confident, as it’s difficult to prove with data, and I usually don’t consider sensory experience alone as sufficient evidence.
Many report that after burr alignment, the puck can withstand higher pressure at the same setting when making espresso, suggesting fewer large particles. However, since my burrs couldn’t make 9 bar espresso in the first place (98mm SSP Brew burrs produce too few fines to build up enough pressure, and I don’t own a pressure profiling machine), I didn’t test this.
For me, the most significant benefit of aligning the burrs is being able to rule out the grinder as a factor when the coffee doesn’t taste good. In simpler terms, when the coffee is off, I don’t have to wonder if the grinder is to blame. This peace of mind is valuable (though it also means one less excuse for bad-tasting coffee, which is somewhat inconvenient).
Perhaps the real reason for alignment, as mentioned in the alignment tutorial video I referenced earlier, is to give us coffee enthusiasts a good night’s sleep, knowing our grinder is as aligned as possible.